Navigation an/aus
Home
Leistungen
Galerie
Kleinmöbel und Türen
Gartenschuppen
Außenbereich
Terrasse
Fußboden
Zählerkastenverkleidung
Lichtkasten
Balkon
Bau einer Tür aus altem Holz
Reparatur einer alten Terrasse
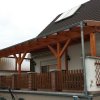
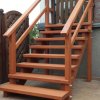
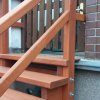
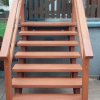
Terrassenüberdachung und Treppe
Gartentor
Kinderspielhaus mit Buddelkasten und Kletterturm
Bank aus altem Holz
Reko einer Treppe
Einbaumöbel
Gartenbank
Traktor Kinderbett
Spielzeugkiste für Buddelkasten
Bau einer Treppe
Werkstattregale
Restaurierung einer alten Tür mit Einbau einer Mehrfachverriegelung
Empfangstresen
Impressum
Datenschutzerklärung
Ordering
Ordering Ascending
Ordering Descending
Title Ascending
Title Descending
Date Ascending
Date Descending
Rating Count Ascending
Rating Count Descending
Rating Ascending
Rating Descending
Hits Ascending
Hits Descending
Display Num
5
10
15
20
50
All
Powered by
Phoca Gallery